

User guide · 07
Album website: a gift for your client
Turn an album into a wedding, yearbook, birthday or portrait website with videos and music, and let your client write the story.
Updated
An album website lets you give your client something extra on top of the photos: a website of their very own. Instead of sending family a plain photo-viewing page, your client gets a wedding website that tells their love story, a yearbook website for the whole class, a birthday website for a little one, or a portrait keepsake. It has a big name at the top, a story, highlights, YouTube videos, background music and the photos. Clients love showing it off: they send one link or QR code to friends and family, and nobody needs an account.
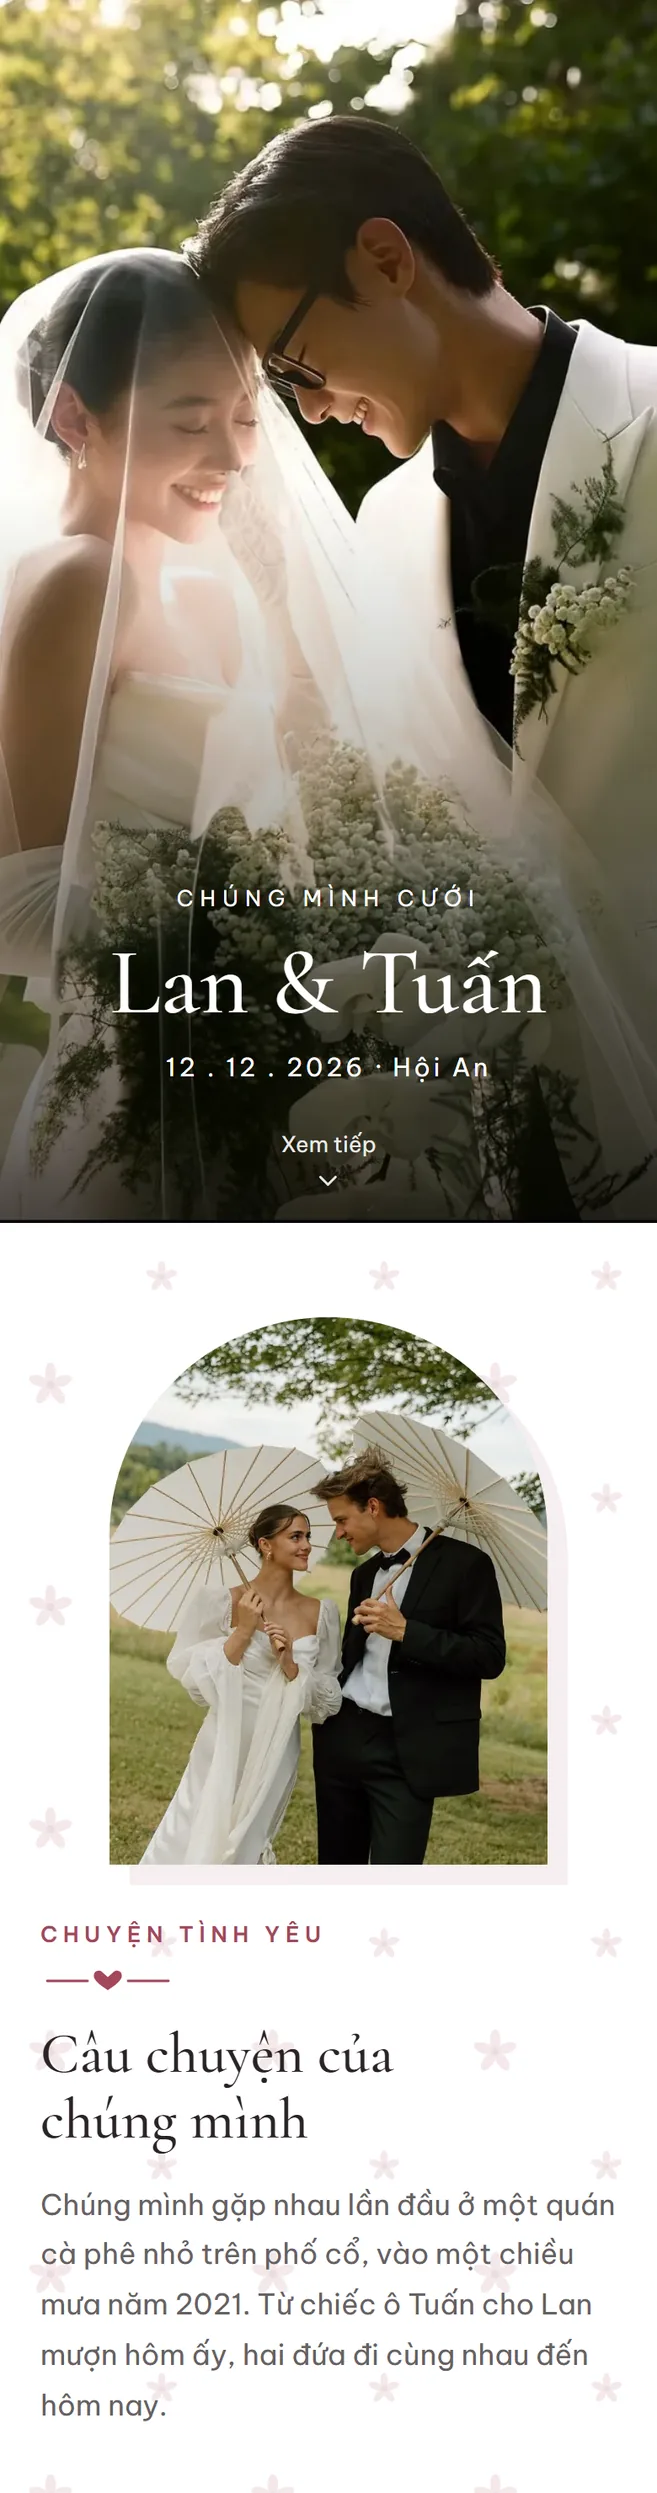
Making an album website is easier than you think: no design or coding skills, no hosting, no domain to buy. Pick a topic and the layout, colours and fonts are ready; the photos come straight from the album; the preview changes as you type. You do not even have to write the story yourself: send your client a link to fill it in, check it, and click Publish website.
That gift is also free advertising for you. The bottom of every album website shows your details: logo, phone number, Zalo, Facebook, studio website, address. Every person your client sends the link to learns who took the photos and can reach you straight away.
An album website is not the same as Website Studio: Website Studio presents your studio, an album website tells the story of one shoot and one client.
Why give your client an album website
- Easy, anyone can do it: 5 guided steps, a topic that fills everything in, and you only change the names, the date and the photos. No design or coding skills needed.
- Added value for your package: the same shoot now comes with a website in the client's name. It sets you apart from studios that only send a Drive link.
- A gift they show off: clients send the link to family and friends. Everyone sees the photos, hears the music and watches the videos, like a wedding card or a yearbook on their phone.
- Free marketing: the footer shows all your contact details. The more the website is shared, the more new clients find you.
- Clients tell their own story: send an Ask the client to fill in link and the client writes the story and picks favourite photos on their phone. You check it before it goes live.
- Light pages: videos load only when the visitor taps them, and photos are sized down for phones.
Open the website builder
- Open the album you want to make a website for.
- Click More features, then Website.
- The builder opens: the 5 steps on the left, the fields in the middle and a live preview on the right that changes as you type.
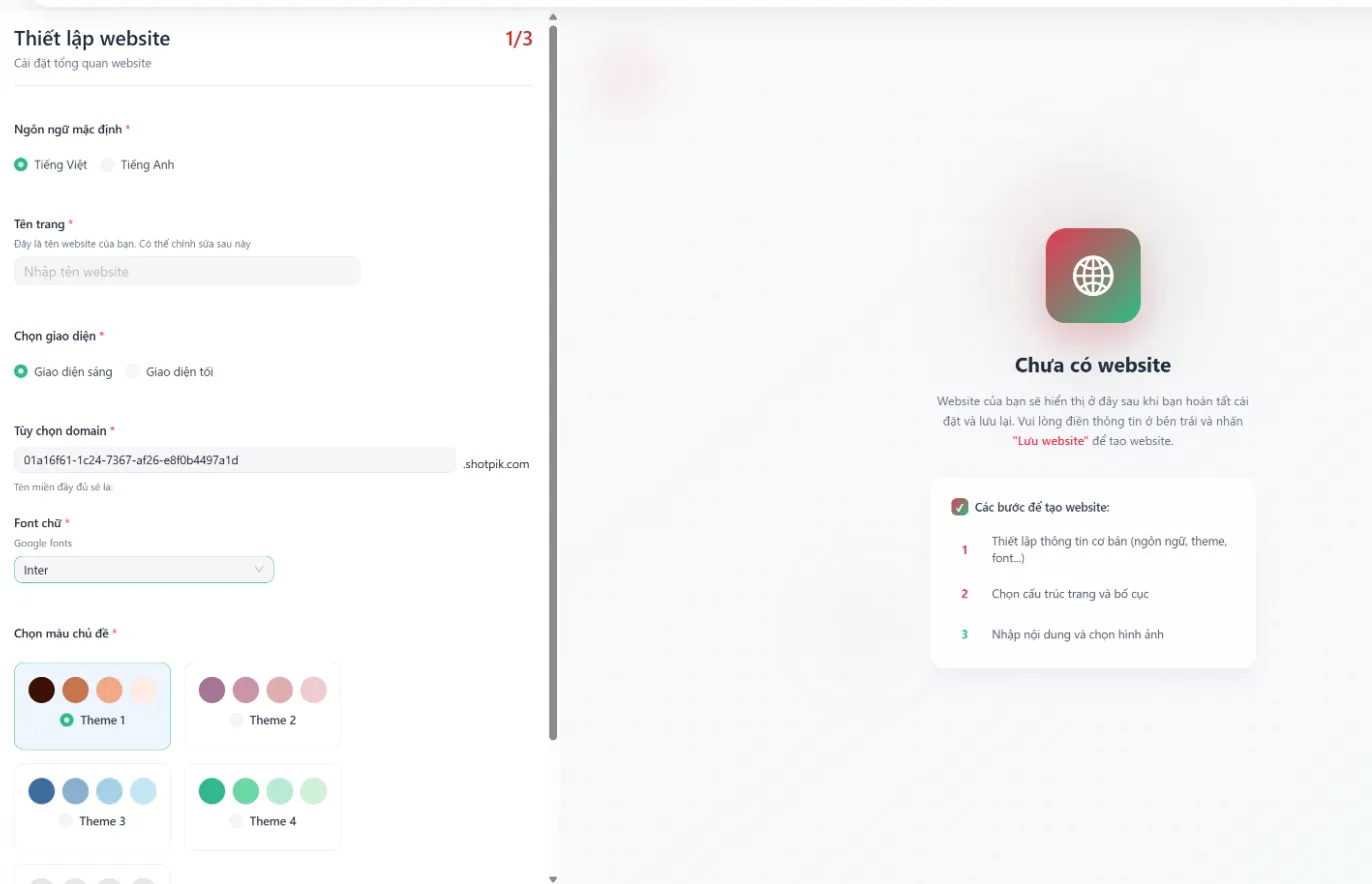
- The builder works on a computer or laptop. The finished website looks good on phones too.
- Click Desktop or Phone above the preview to check each screen.
- Click a part of the preview (the big name, the story, the videos…) to jump to where you edit it.
- How many new album websites you can make each month depends on your plan; see plans and prices.
Step 1: Topic
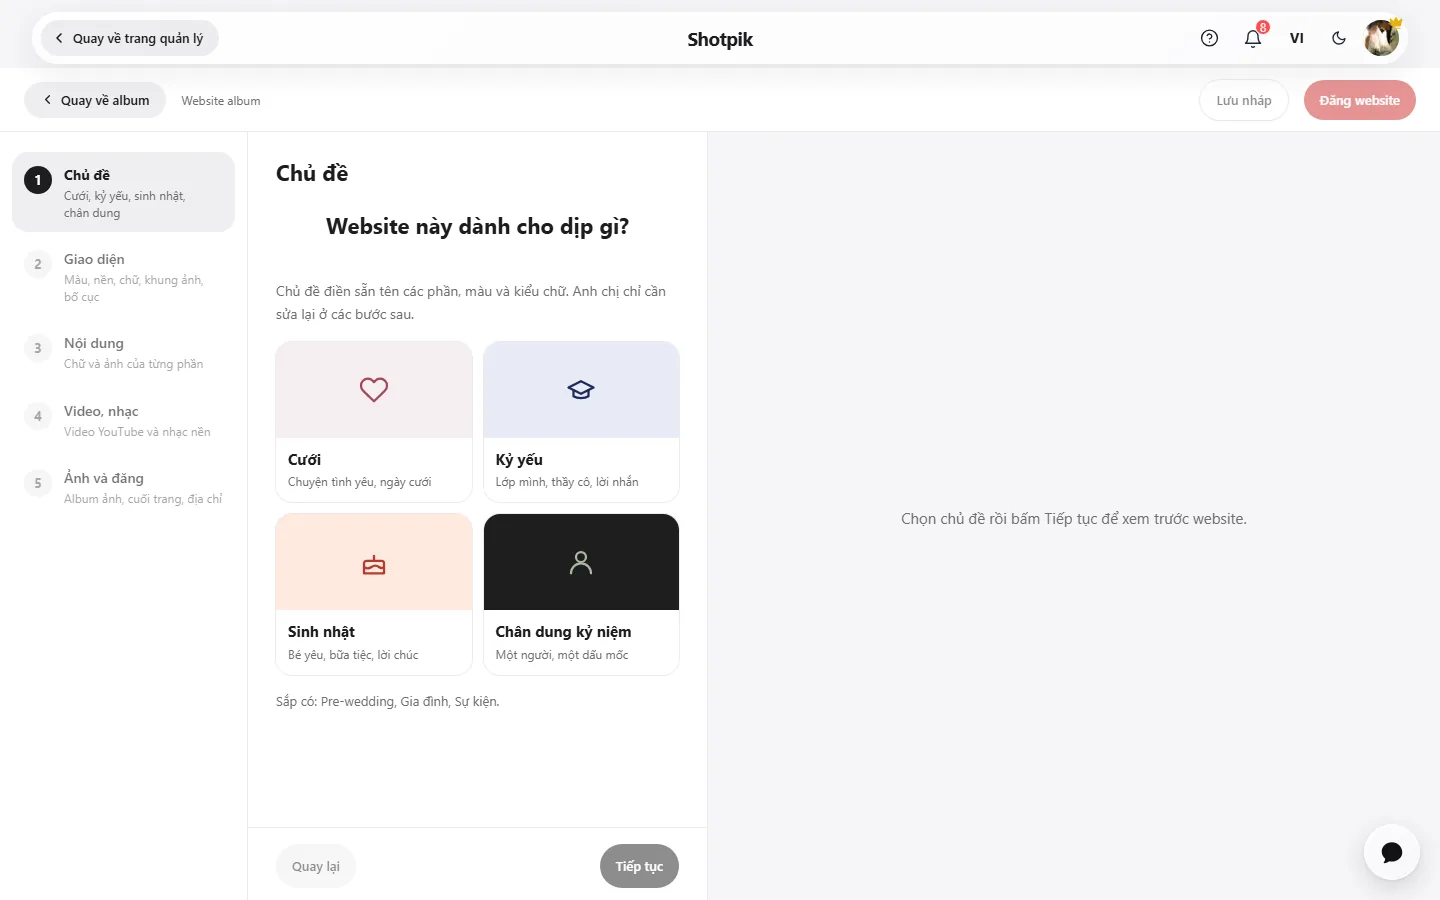
Pick the occasion. The topic fills in part names, colours and fonts that suit it.
| Topic | Good for |
|---|---|
| Wedding | The love story, the moments of the day, a thank-you. |
| Yearbook | The class, a message from the teacher, the class's promise to each other. |
| Birthday | The little one, the party, wishes from the parents. |
| Portrait keepsake | One person, one moment to remember. |
If you change the topic later, the words, colours and fonts switch to the new topic's. Photos, videos, music and background stay, and Shotpik asks before switching.
Step 2: Look
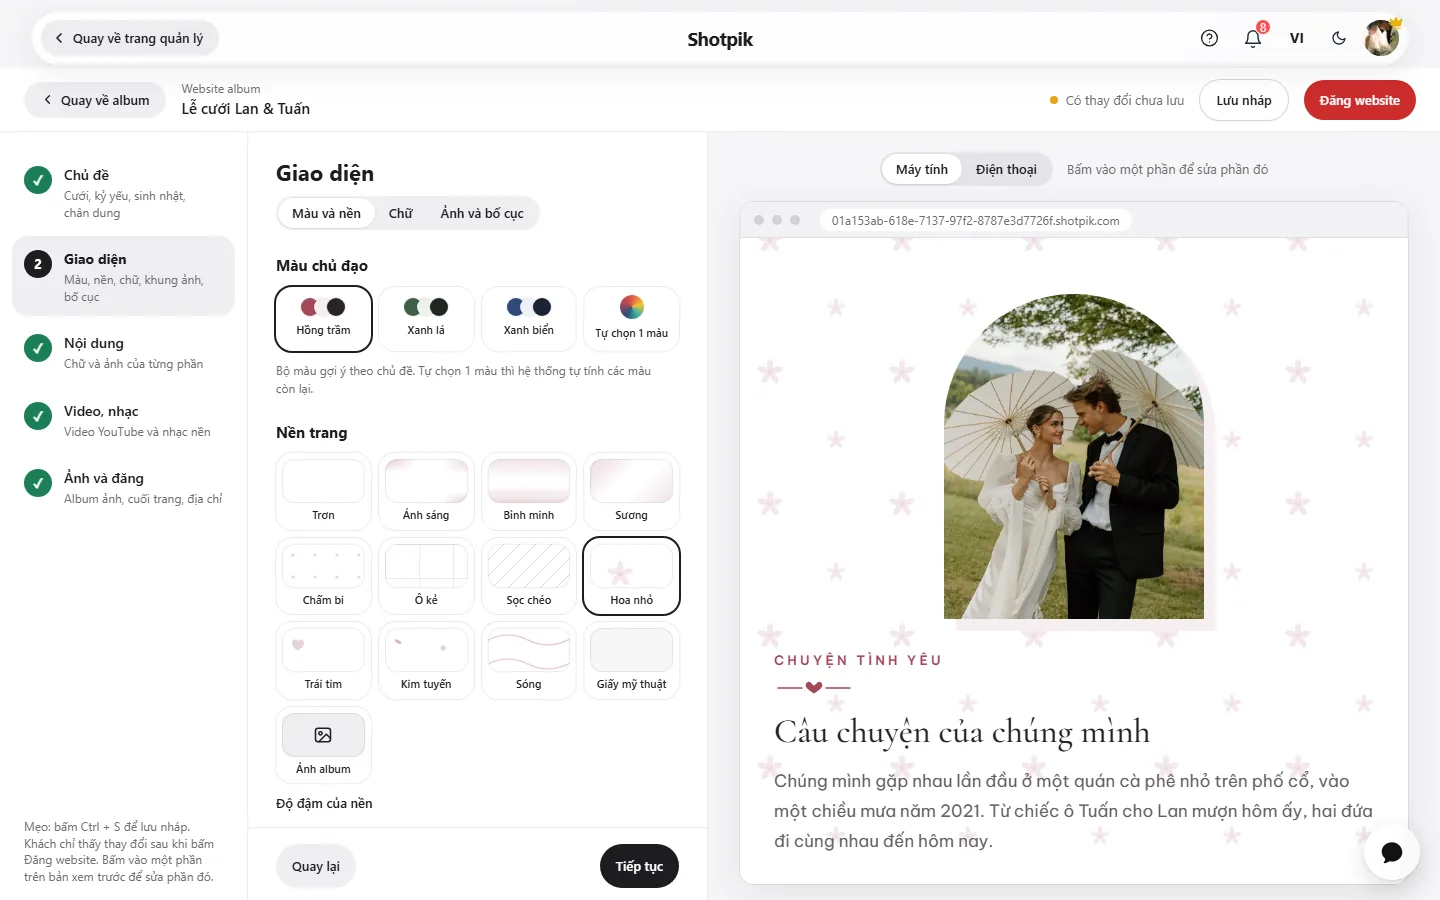
This step has 3 tabs:
- Colours: pick a suggested palette (Dusty rose, Green, Sand, Dark…) or Pick a colour and Shotpik works out the rest. Choose a Page background: plain, glow, mist, dots, Flowers, hearts, Fine paper… or a blurred Album photo. Set the Background strength to taste.
- Fonts: choose the Heading font (Elegant, Classic, Modern, Playful, Gentle) and a Handwritten font for the big name at the top. All of them show Vietnamese accents in full. Choose the Website language (Tiếng Việt or English) for the words on the buttons.
- Photos & layout: choose the Photo frame (Rounded, Square, Arch, Circle, Print) and the Layout of each part, for example a full-screen photo at the top or words on the left and a photo on the right; event moments as cards or a timeline.
Step 3: Content
Fill in the words and pick photos for each part: Top, Story, Event, Highlights (up to 6 photos), Videos and Album.
- Untick Show this part on the website to hide a part you do not need.
- The event part has up to 4 moments, for a wedding for example: 08:00, Ancestor ceremony, Bride's home.
- Move photo: a head or feet cut off by the frame? Click this button under the photo and drag the circle onto the face. That spot always stays in the frame, on computers and phones.
- The Ask the client to fill in box is at the top of this step (see Ask the client to fill in below).
Step 4: Videos, music
- YouTube videos: paste a video link, up to 6 videos. The title comes from YouTube and you can change it. Drag to reorder, and use Make it the first video for the one visitors should see first.
- Background music: pick one of the Shotpik songs (Romantic, Gentle or Cheerful, free to use) or paste a public song link From SoundCloud. Press Listen before you choose.
Browsers do not let a website start sound by itself, so visitors tap the music button in the corner of the screen to listen.
Step 5: Photos & publish
- Photos on the website: choose All photos in the album, Photos the client hearted or Edited photos.
- Footer: your details: choose what shows at the bottom of the website: logo, phone number, Zalo, Facebook, studio website, address. These come from your Profile; change your phone number there and every website follows.
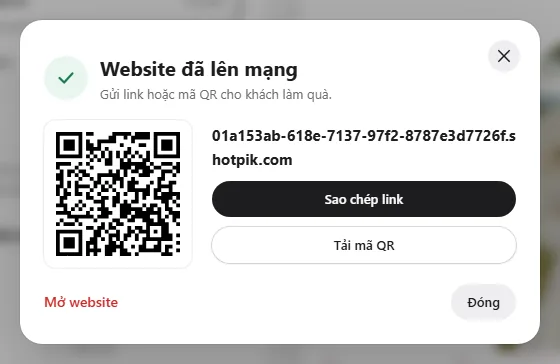
- Website address: by default the album's code, for example
album-code.shotpik.com. Plans with your own domain (Professional and up) can set an easy name, for examplelan-tuan. - Click Publish website. Shotpik shows the link with Copy link and Download QR code buttons, ready to send to your client.
The website is always public, even when the album has a password. Visitors only see the photos you chose, never the album itself.
Drafts and publishing
- Save draft (or Ctrl + S): keeps your changes; visitors do not see them yet.
- Publish website: visitors see the new version straight away.
- The status at the top says whether the website is a draft or published, and whether there are unsaved changes. A website that was never published shows a "coming soon" page.
- Open the live website: see what visitors see, in a new tab.
Ask the client to fill in
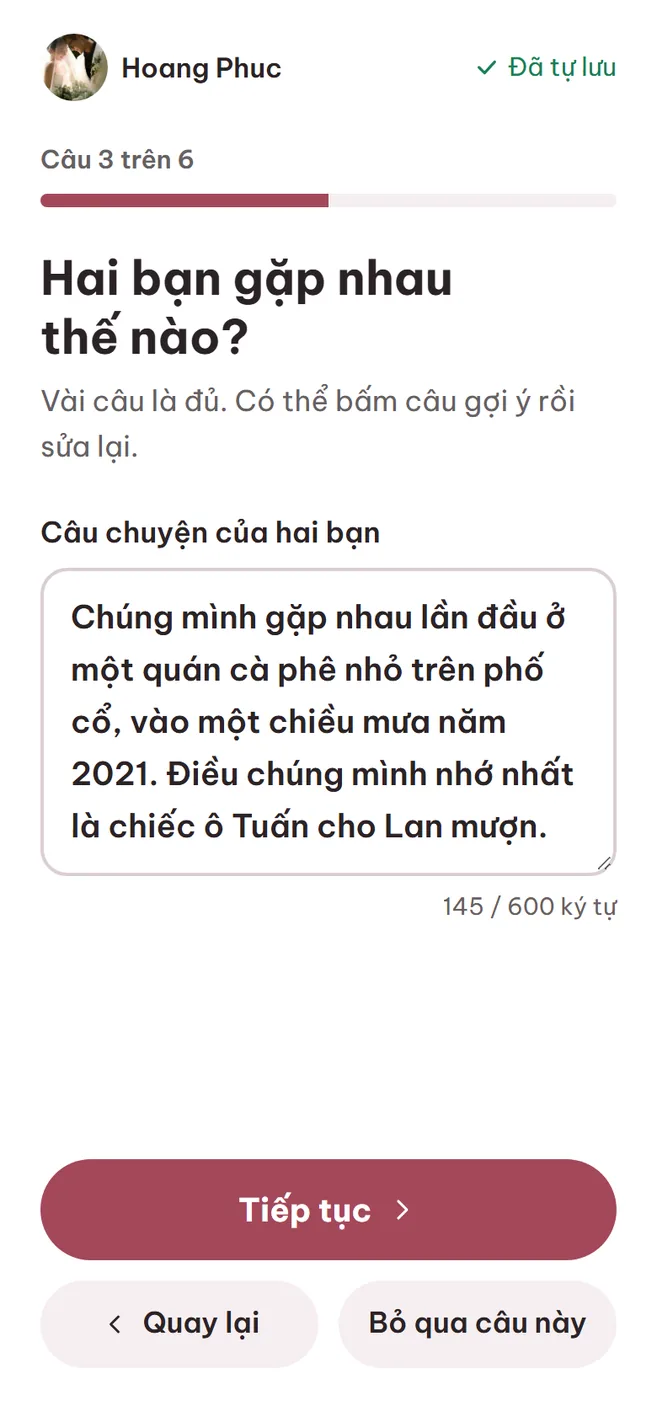
The love story, the class's message, the wishes for the little one: clients write them best. Send your client a link and they answer a few short questions on their phone.
- In the Content step, click Make a link for the client in the Ask the client to fill in box.
- Click Copy or QR code and send it to your client. The link works for 14 days.
- The client opens the link, no account needed. The questions follow the topic; for a wedding: the bride's and groom's names, the date and place, how they met, a thank-you, their 3 favourite photos and YouTube videos if they have any. Each answer saves itself, so they can stop and come back later. The questions are in Vietnamese.
- The client presses Gửi cho studio (Send to the studio) and you get a notification. The box then says the client finished.
- Open the builder again: the client's words sit right under each field. Click Use this for each one, or Use all. The client's photos have a Use as highlights button, their videos an Add to the website button.
- Adjust anything you like, then click Publish website.
Nothing goes on the website until you use it and publish. To send the link again, click Make a new link (the old link stops working; what the client wrote is kept). Click Stop the link when the client should not change anything more. Asking the client to fill in is on every plan.
Quick questions
Does a password album show its photos on the website?
The website is always public, but it only shows the photos you chose in step 5, for example only the edited photos. Visitors cannot open the album itself.
Can I change the website after publishing?
Yes. Edit it in the builder, click Save draft to keep the changes and Publish website when visitors should see them.
What about a website made with the old template?
Open the builder and pick a topic to move it to the new template. The old website stays as it is until you click Continue.
If I change the address, does the old link still work?
No. The new address is used after you click Publish website; from then on the old link and old QR code no longer open, so send your client the new link.
Still have a question?
Message Shotpik and we will reply during working hours.